
This post contains affiliate links. If you click through and download freebies or purchase items I may receive a small commission. This is at no cost to you.
Gift boxes are an easy and beautiful way to present someone with a gift. They can make a statement on their own before the gift is even seen. Have you ever noticed how the gift boxes in shops are often limited in the designs you can find and they tend to lack any personalization? Purchasing pre made templates for gift boxes is also an option but again you are limited to the designs offered. Now you can make your own customized gift boxes for free using free resources here on Chantahlia Design and Powerpoint. You can also find other free resources in my blog post
We are going to use Powerpoint to make our custom boxes because most people have the Office suite of programs and you don’t need to go out and buy new computer programs. In order to make the gift boxes you will need to download one of my Powerpoint templates. You can find the links at the bottom of the page.

Using Powerpoint to Make your Customized Gift Boxes
Let’s start by opening the downloaded Powerpoint template. The templates are available in US letter size and also in A4. If you have access to an A3 or larger printer you can change the slide size to make larger boxes. You will see two template slides. The top template is the lid of the gift box, the second is the box base.
Let’s do the lid first.
Designing a Pattern on the Lid
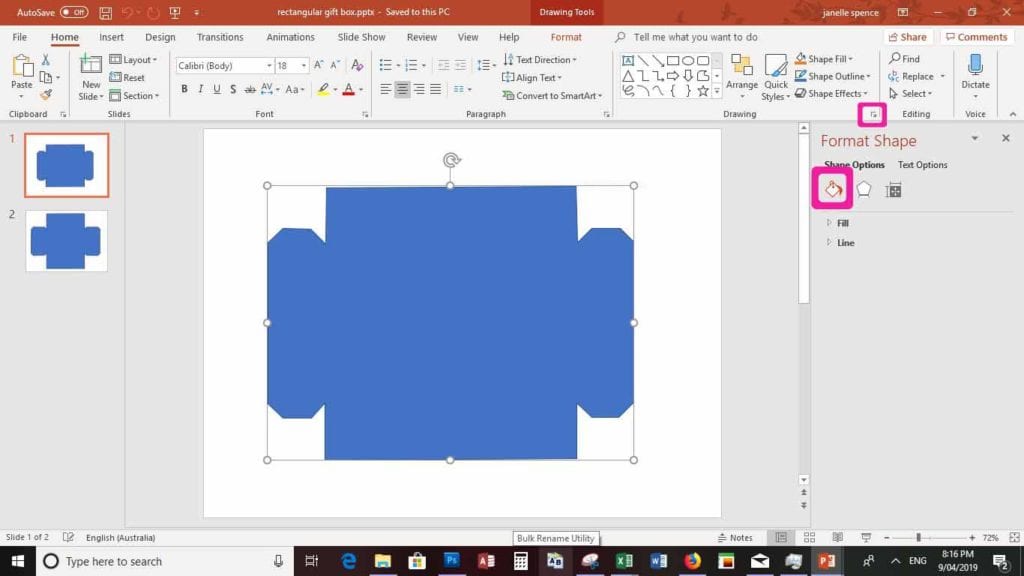
Click on the lid template and on the home tab click on the arrows on the bottom right beneath the shapes area. It is highlighted above. It will open up a side bar, format shape. Then click on the paint bucket to format the design of your lid.
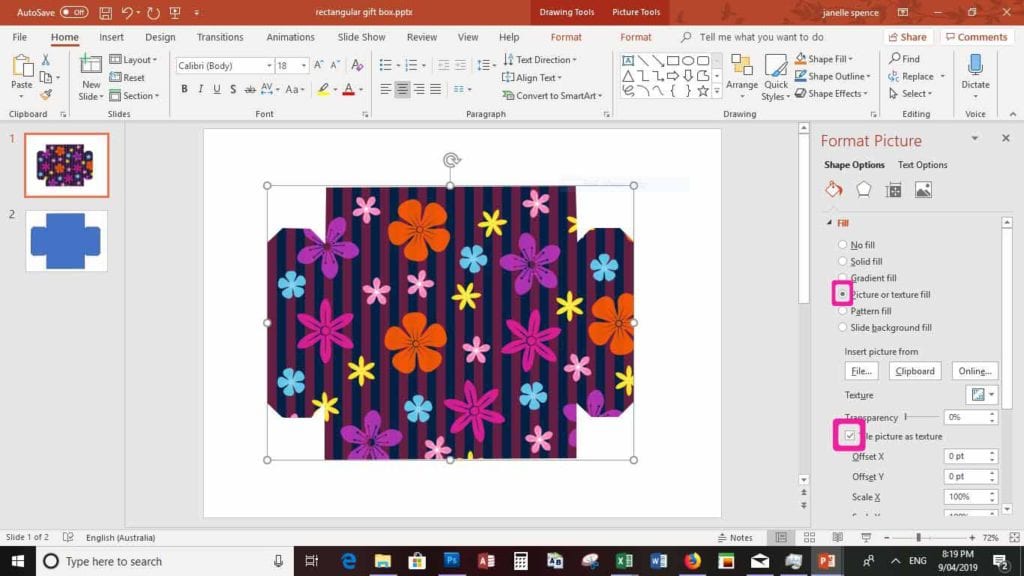
You can select a solid colour or add a digital paper to make a colourful box. I have used the free paper from the Bright Days set here on Chantahlia Design. To add a digital paper click on the picture or texture fill. This will open up the File Explorer on your computer. You will need to find where you have downloaded the digital paper file, choose it and it will look stretched. In order to fix this click on the ‘Tile Picture as Texture’ box to put it back into proportion.
When I made my first boxes I had a line on the edge of my box. This showed up on my box when I cut it out. Maybe I am just bad at cutting out. To remove the line make sure No Line is ticked. You will find the Line boxes under the Fill boxes you have just used. If you are using a white background you might still need the line. It is entirely up to you.
Embellishing the Lid
You can leave the box with just the paper design but the beauty of making your own gift box is to customize it further.

We are going to add a label on top of the pattern. I am using a neon blue label to match the pattern. To do this click on the Insert tab and then picture. Again your File Explorer will open and you need to choose the file you want to use.

Once you insert your label you might want to centre it. You can do this by going to the arrange button on the home tab. Click on align and then choose how you want it aligned. In order to centre the label I have chosen Align Centre and Align Middle.

Now you can add your personalized message. Go to the Insert tab and add a text box. You can see the buttons highlighted above. Now return to the home tab, choose the font you want to use and type your message. I have chosen Happy Birthday on this lid. This is very generic but you can personalize this even more with someone’s name, a piece of clip art or monogram. The possibilities are endless.
Designing the Base
Design the base following the steps as for the lid to add the digital paper. Instead of a patterned base you can use a solid colour base. In order to match perfectly with the lid, you need to pick the same colour. Instead of clicking on the template add your digital paper on the slide and it will fill the background.
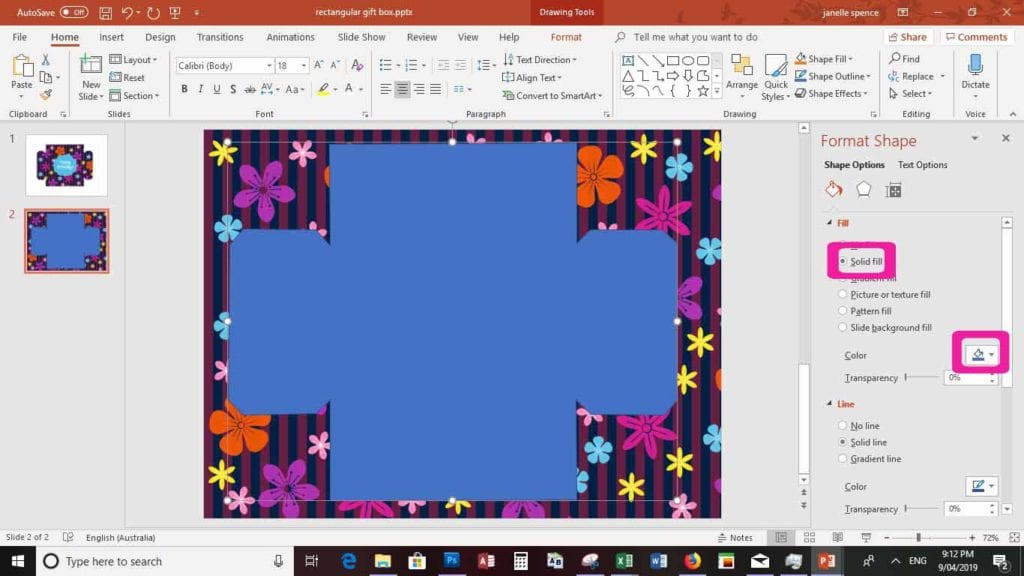
Next, click on the base template and click solid fill as show above. Click on the eyedropper then the colour in the paper you want the base to be. I am choosing the navy. Now you have the colour, click on the background and delete the pattern. If this doesn’t work you can set the transparency to 100% The transparency is under the colour selector. Now you have a matching solid base. Now it’s time to print them off.

Variations
This is just one example of a box but there are many variations you can make. Instead of a label you can add a brad. You can add a label and then clip art. You can also mix and match patterns for the lid and base. The possibilities are endless.
Putting your Customized Gift Boxes Together
You’ve printed your box so now it ‘s time to cut it out and put together your customized gift box.
What you will need
Cardboard / Card Stock. To make your gift boxes sturdy you want to use card stock that is not less than 200gsm. This size is for light weight gifts. If you want a sturdier box I recommend using a thicker card stock. Just be sure to check your printer accepts heavy card if you choose to use this.
Scissors if using lighter card
A ruler, pen for scoring, X-Acto knife and a cutting board if using heavy card.
Craft Glue.
How to put it together
Next, cut out your lid and base. If using light weight card stock, use your scissors. If using heavy card stock you will need to use your cutting knife and cutting board. Now you need to fold them. To stop destroying your design, your template has no folding lines. The following picture shows the folding lines. The fold lines are the same for the base and the lid.

Once you have folded the pieces you need to glue the corners. Most people put glue on side. Instead it is better to put glue on both sides as they will actually stick together and stay together more easily. Glue to corner tabs to the inside for the best look.
Congratulations, you have now made your own customized gift box!

TEMPLATE DOWNLOAD LINKS
You can download the square Powerpoint gift box template HERE
You can download the rectangular Powerpoint gift box template HERE
