
Have you ever wanted to learn how to make your own customized bunting banners for free? You might call them banners or bunting, but whatever you call them banners make a statement. You can use them in the classroom so as to highlight a topic or an area in the classroom. They are also great party decorations and can be used anywhere you want to make something standout.
You can easily purchase banners, even customized bunting banners but it is quick and easy to make your own using free digital papers, alphas and clip art HERE on chantahliadesign.com or from other freebie sites. Because with freebies, your only cost is the cost of ink to print them out. All banners shown have used digital papers, alpha and clip art from here on Chantahlia Design.
Tutorial
We are going to use Powerpoint to make these customized banners.
Firstly, start by opening a new document in Powerpoint.
Secondly, to make the correct size of the paper you want to use, head over to the design tab and choose ‘slide size’ to the right of screen. Choose custom slide size and then choose the size you want, whether it be letter or A4. If you check the portrait button it will make it easier to see what we are doing.

Click OK. Then choose Maximise so it will fill the page.

Click on the boxes and delete them so you have a plain slide.
So your slide should look the shape of a regular piece of paper. This will make it easy to see what you are doing.
To start with, we are going to make full page triangle banner bunting however we will see others later in the tutorial.
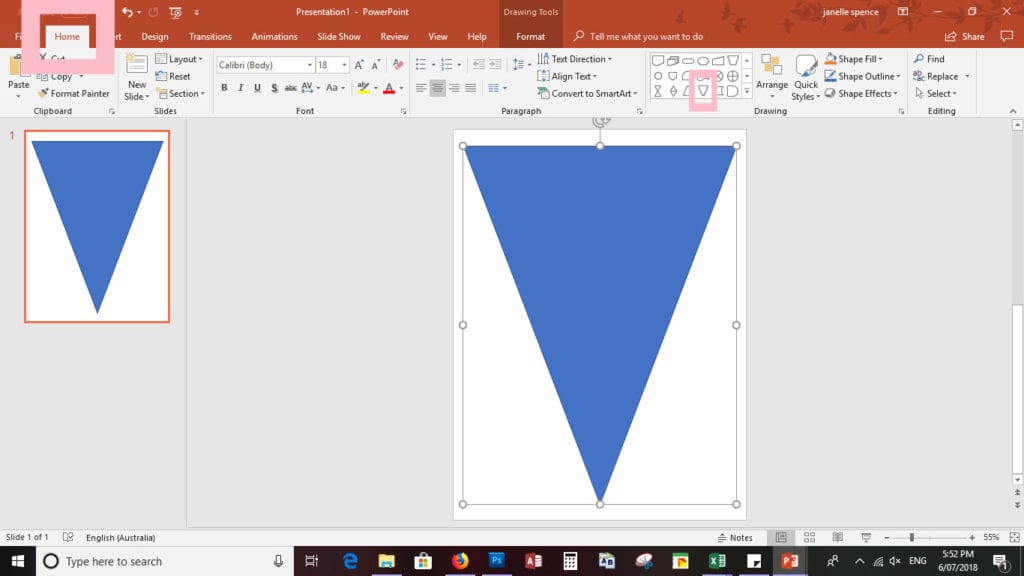
Next, move to the home tab on Powerpoint and move to the shapes area and choose the triangle. Draw a triangle to fit on the page. When you size your shape you might want to leave some extra space at the top for folding the paper over.
As you are making a string of these for your banner, right click on the slide and click duplicate slide so this will keep your banners the same size. If you want all of your banner pieces to have the same design you need to do this step after you have inserted the design. hwoever, if the backgrounds are to be different, duplicate them now so as to save you some time.
After that we need to insert our digital paper. Move over to the little arrow, to the right of the shapes beneath the shape effects. Because it is just a small arrow with no words I have highlighted it for you on this picture.

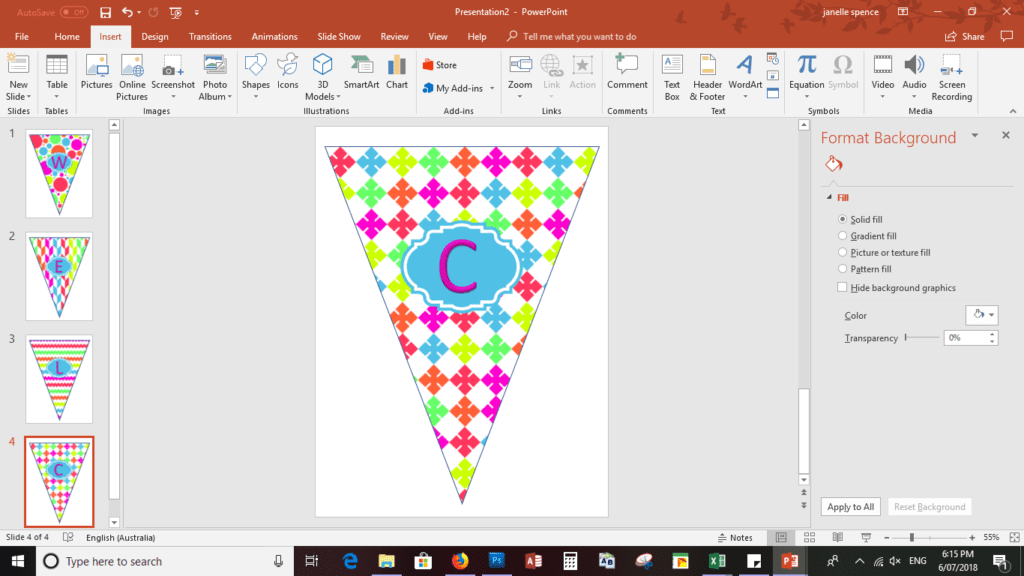
Once you have found it, click on the arrow. When the screen appears, click on the paint bucket. This will give you the fill option. Add your digital paper by clicking on picture or texture fill. So now you click the option to choose a file from your computer. Make sure you have already downloaded the paper you wish to use. Remember there are thousands of free papers available right here on Chantahlia Design that you can use. You can find them HERE
The paper will look out of proportion so click on the ‘Tile picture as texture box’ as highlighted above. This will use the paper as designed.

Now you can add any clip art or alphas you like. Again these are available for download right HERE in Chantahlia Design.
Click on the insert tab, choose picture and then choose the file from where you have downloaded it on your computer. For this one I have added a brad alpha to spell out Chantahlia design. You can find all the free alphas on Chantahlia Design HERE

You can insert a label and then a letter from an alpha.
Variations
Another example is the baby shower banner with clip art. I would personally use a picture design on the first and last banner as well as a picture bunting in between two words.

You will have noticed that this is a different shape. It is done exactly the same way but using a flag shape from the shape box. Next, click on the box to the bottom right of the shapes and the drop down box of shapes will display for you.
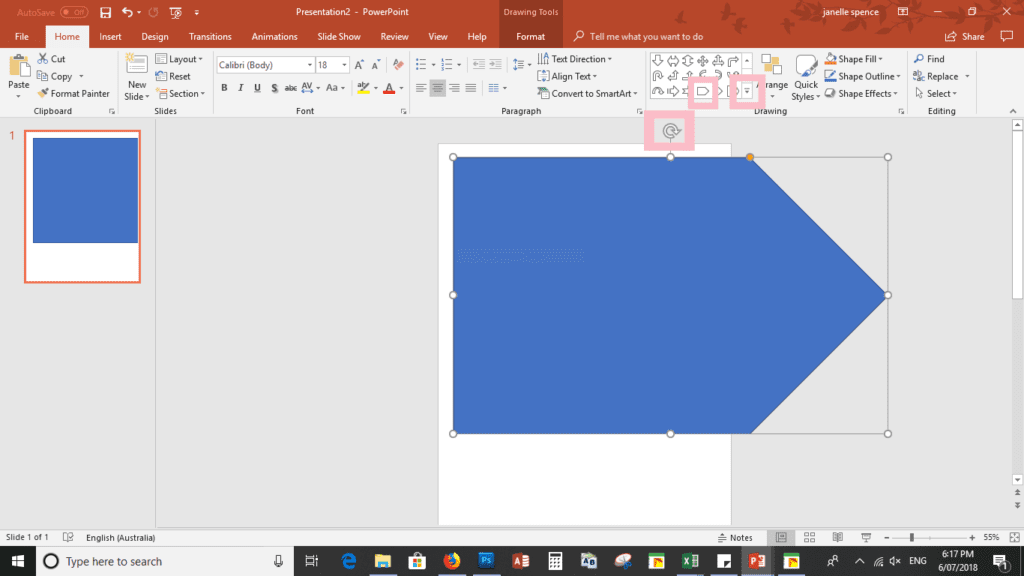
Now, select the flag shape. It will insert on the side and all you need do is rotate it by turning the rotation symbol.
Likewise don’t forget to duplicate your slide to make all your flags the same size.

Once your banner is to your liking, it’s ready to print. Remember to set your printer to full page printing to print the whole banner.
Congratulations. You have printed your first customized banner! As you get used to following this procedure these will be super quick and easy to make.
Finally you can hang these by folding the top of the bunting over to make a loop that you can put some string through. Coloured string is an awesome addition.
You can also punch holes through the top of each one and attach them using string.
Now it’s Time to get Creative
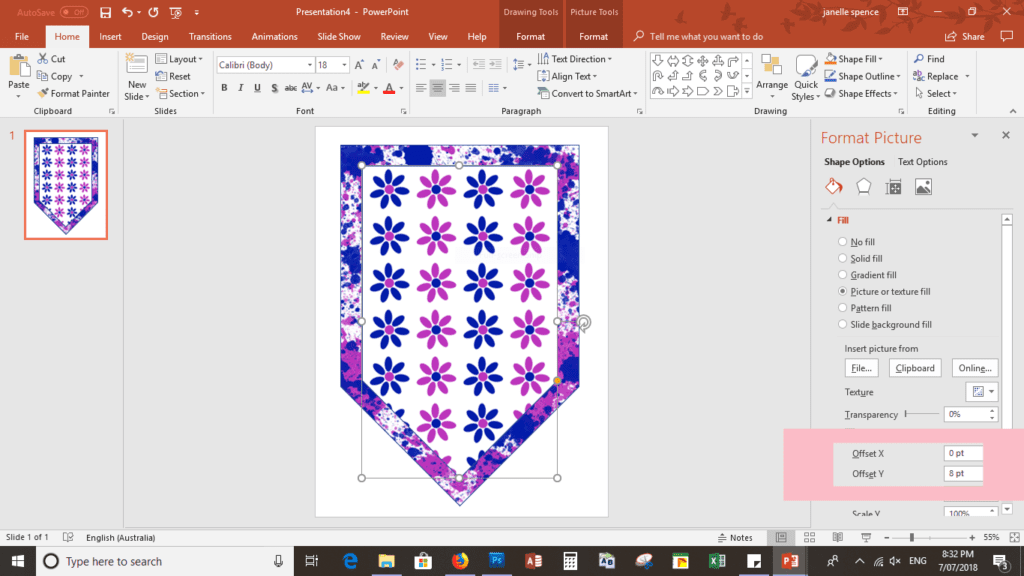
Now you can get creative and start making customized bunting banners in different styles and shapes. For example, you can make two flag shapes, one on top of the other with different designs. If you want to move the pattern across slightly you can do this by changing the offset settings as highlighted.
Consequently you can choose any shape you want to use to make your banner bunting. Making the bunting becomes markedly quicker and easier as you go.
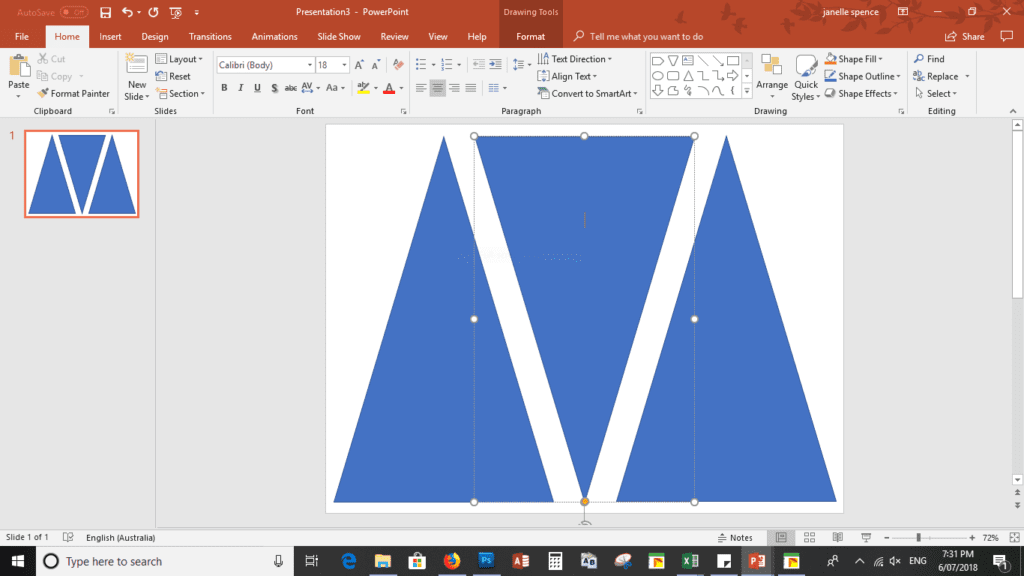
In order to make a smaller size bunting, fill your page with three triangles. You will need to leave your page set at landscape to create these. I make one triangle and then copy and paste others to keep them sized the same. Don’t forget to rotate the centre and fill your page so you can save paper.
Enjoy your new found skill making bunting banners and remember to save this in your Pinterest account so you always know where to find free quality digital designs! You can also learn how to make your own binder covers using the same method HERE
FREE DOWNLOADS
Find free digital papers HERE Use the search bar at the top of the page if you have a specific colour or pattern you want, for instance pink.
Free alphas can be found HERE Use the search bar at the top of the page if you have a specific colour or theme you want , for example – nautical
Find free clip art / elements HERE Use the search bar at the top of the page if you have a specific colour or theme you want, for example – label